The Perfect DIY Pumpkin Bird Feeder for the Fall: Easy Guide
Create the perfect DIY pumpkin bird feeder for the fall with simple steps and minimal materials. Attract birds while recycling pumpkins.
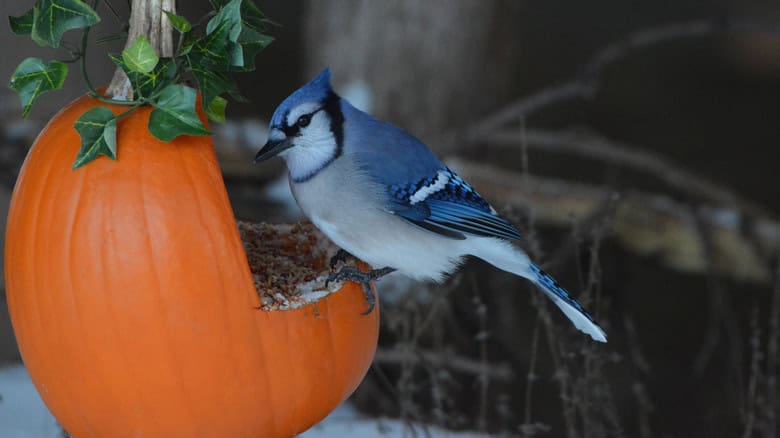
Fall is the perfect time to get creative with DIY projects, and making a pumpkin bird feeder is both fun and eco-friendly. Pumpkins are abundant during this season, and turning them into bird feeders not only recycles them but also provides a natural food source for birds.
This project is simple and requires minimal materials, making it an ideal activity for families and individuals alike. By following a few easy steps, you can craft a feeder that will attract a variety of birds to your yard, adding life and color to your autumn landscape.
Introduction To Diy Pumpkin Bird Feeder
Fall is a wonderful time for crafts and nature activities. One fun project is making a DIY Pumpkin Bird Feeder. This feeder is easy to create and helps our feathered friends. Let’s explore why a pumpkin is a great choice and the benefits it brings to birds.
Why Choose A Pumpkin?
There are many reasons why a pumpkin makes the perfect bird feeder. First, pumpkins are biodegradable, which means they naturally break down. This is good for the environment.
Second, pumpkins are easy to find in the fall. They are often available at local farms and stores. This makes them a convenient choice for a bird feeder.
Third, pumpkins are sturdy and can hold seeds well. They can withstand the outdoor elements, making them ideal for a bird feeder.
Benefits For Birds
Birds benefit greatly from pumpkin bird feeders. Here are some key benefits:
- Nutrition: Pumpkin seeds are rich in nutrients. They provide energy for birds.
- Shelter: The pumpkin offers a cozy spot for birds to rest. It can protect them from wind and rain.
- Attraction: A pumpkin bird feeder attracts a variety of birds. This helps you enjoy more birdwatching.
Creating a DIY Pumpkin Bird Feeder is simple and rewarding. It supports local wildlife and adds charm to your garden. Stay tuned for the next steps on how to make your own!

Credit: todayineeda.wordpress.com
Materials Needed
Creating a DIY pumpkin bird feeder is a fun fall project. Before you start, gather all the materials you need. Having the right tools makes the process easier and more enjoyable. Here, we’ll list the essential tools and optional add-ons to enhance your bird feeder.
Essential Tools
- Pumpkin: Choose a medium-sized pumpkin. Make sure it is ripe and firm.
- Spoon: Use a sturdy spoon to scoop out the pumpkin seeds.
- Knife: A sharp knife helps to cut the pumpkin safely.
- Twine or String: This will hang your bird feeder from a tree.
- Drill: A drill makes creating holes in the pumpkin easy.
- Bird Seed: Choose bird seed that attracts local birds.
Optional Add-ons
- Peanut Butter: Spread inside to hold seeds better.
- Perches: Use small sticks for birds to rest on.
- Decorations: Add leaves or flowers for extra charm.
Below is a quick reference table for the materials needed:
| Item | Purpose |
|---|---|
| Pumpkin | Main body of the feeder |
| Spoon | Remove seeds |
| Knife | Cut the pumpkin |
| Twine or String | Hang the feeder |
| Drill | Create hanging holes |
| Bird Seed | Food for birds |
| Peanut Butter | Optional, holds seeds |
| Perches | Optional, resting spots |
| Decorations | Optional, adds charm |
Preparing The Pumpkin
Creating a DIY pumpkin bird feeder is a fun fall project. The first step is preparing the pumpkin. This involves cleaning and creating the opening. Let’s dive into these steps to ensure your bird feeder is perfect.
Cleaning The Pumpkin
Before turning the pumpkin into a bird feeder, it must be clean. Use a damp cloth to wipe off any dirt. This ensures that the pumpkin is free from bacteria.
Next, use a sharp knife to cut off the top. This will help in removing the seeds and pulp. Scoop out the insides using a spoon. Make sure the pumpkin is completely hollow.
Once cleaned, rinse the inside with water. Let it dry thoroughly before moving to the next step.
Creating The Opening
After cleaning, you need to create an opening for the birds. Cut a large hole on one side of the pumpkin. The hole should be big enough for birds to enter easily.
Use a stencil to trace the shape of the opening. This ensures a neat and even cut. Carefully cut along the traced lines using a sharp knife.
You can also create multiple small holes. This allows more birds to feed at once. Make sure the edges of the openings are smooth.
Now, your pumpkin is ready for the next steps in creating the perfect bird feeder.
Designing The Feeder
Creating a bird feeder from a pumpkin is a fun fall project. It’s eco-friendly, easy to make, and attracts many birds. Let’s dive into how to design the perfect pumpkin bird feeder.
Choosing A Shape
Decide what shape your pumpkin bird feeder will be. Consider round, oval, or even a heart shape. Choose a shape that is easy to cut and has enough space for seeds. A round shape is the simplest and most common.
Use a sharp knife to carve out your chosen shape. Make sure the edges are smooth to avoid hurting the birds. A round or oval shape works best for small birds.
Adding Perches
Perches make it easier for birds to eat from your feeder. Use small sticks or dowels as perches. Insert them securely into the pumpkin so they don’t wobble.
Place the perches near the feeding area. Ensure they are at a good height for the birds. Add at least two perches to accommodate more birds. You can use toothpicks or small branches as additional perches.
Here’s a simple table to help you remember:
| Item | Purpose |
|---|---|
| Pumpkin | Main body of the feeder |
| Knife | Carving shapes |
| Sticks/Dowels | Perches for birds |
With these steps, you can design a unique pumpkin bird feeder. Enjoy watching birds flock to your creation this fall!
Assembling The Feeder
Creating a pumpkin bird feeder is a fun and rewarding fall project. It’s simple to make and attracts beautiful birds to your yard. Follow these steps to assemble your feeder.
Attaching The Perches
Birds need a place to sit while they eat. You can use sturdy sticks for this purpose. Follow these steps to attach the perches:
- Find two strong sticks about 6 inches long.
- Make two holes on opposite sides of the pumpkin.
- Insert the sticks through the holes.
- Ensure the sticks are secure and can support the birds.
Now, your birds have a place to perch while they enjoy their meal.
Securing The Feeder
It’s important to hang your feeder securely. Follow these steps to ensure it stays in place:
- Cut four equal lengths of strong twine.
- Tie each piece of twine to the top of the pumpkin.
- Bring all four pieces together at the top.
- Tie a knot to create a loop for hanging.
- Hang the feeder from a tree branch or hook.
Double-check that the feeder is stable and won’t fall.
Congratulations! Your pumpkin bird feeder is ready for fall visitors. Enjoy watching the birds flock to your yard.

Credit: www.amazon.com
Filling With Birdseed
Creating a DIY pumpkin bird feeder is a delightful fall activity. Once your feeder is ready, the next step is filling it with birdseed. This part is crucial for attracting birds to your yard. Let’s explore the best seed mixes and the right amount to use.
Best Seed Mixes
Choosing the right seed mix ensures a variety of birds visit your feeder. Here are some popular options:
- Black Oil Sunflower Seeds: These are rich in oil and attract many birds.
- Nyjer Seeds: These tiny seeds are loved by finches and small birds.
- Safflower Seeds: Squirrels dislike these, but many birds enjoy them.
- Millet: This is a favorite for ground-feeding birds like sparrows.
A mix of these seeds can cater to a wide range of bird species. Ensure the seeds are fresh and free of mold.
How Much To Use
Filling your pumpkin bird feeder with the right amount of seed is essential. Here’s a simple guide:
- Fill the feeder about halfway.
- Check daily and refill as needed.
- Avoid overfilling to prevent waste and spoilage.
Regularly cleaning and refilling the feeder keeps the birds healthy and happy. Too much seed can attract pests and cause mold growth. Always monitor the seed level and adjust accordingly.
| Seed Type | Amount (cups) |
|---|---|
| Black Oil Sunflower Seeds | 2 |
| Nyjer Seeds | 1 |
| Safflower Seeds | 1 |
| Millet | 1 |
Using this table, you can mix and match seeds for a balanced blend. Happy bird watching!
Placing The Feeder
Creating a DIY pumpkin bird feeder is fun. Placing it correctly ensures birds enjoy their new treat. Let’s explore the best spots for your feeder.
Ideal Locations
The feeder should be in a visible spot. This helps birds find it quickly. Choose a quiet area, away from busy paths. Birds need a sense of safety to visit often.
Nearby trees or shrubs offer cover. Birds can escape predators easily. Avoid placing the feeder too close to windows. Birds might fly into them and get hurt.
Consider placing the feeder near a window you watch. This way, you enjoy the birds’ visits. Just make sure it’s at a safe distance.
Height Considerations
The height of the feeder matters. Place it 5-6 feet above the ground. This height deters cats and other predators.
If you have hanging plants, consider similar heights. This creates a uniform look in your garden. For balcony spaces, make sure the feeder is within arm’s reach. This makes refilling and cleaning easier.
Use sturdy hooks or stands. Wind and weather can knock over flimsy setups. Secure the feeder well to keep it in place.
| Location | Pros | Cons |
|---|---|---|
| Near Trees | Offers cover, safe escape | May attract more predators |
| In the Open | Easy for birds to spot | Less protection for birds |
| Near Windows | Great for bird-watching | Risk of bird collisions |
Place your feeder thoughtfully. Your garden will soon be a bird haven!
Maintaining The Feeder
Maintaining your DIY pumpkin bird feeder ensures it remains a welcoming spot for birds. Proper care involves regular cleaning and timely refilling. Follow these simple tips to keep your feeder in top shape throughout the fall season.
Cleaning Tips
- Clean the feeder at least once a week.
- Use warm, soapy water to remove debris and residue.
- Rinse thoroughly with clean water to remove soap.
- Dry the feeder completely before refilling it.
- Inspect the feeder for mold or mildew signs.
- Replace the feeder if it shows significant wear or damage.
Refilling Schedule
Refill your pumpkin bird feeder regularly to keep birds coming back. An empty feeder will discourage birds from visiting. Follow this simple refilling schedule:
- Check the feeder every two days.
- Refill with fresh birdseed as needed.
- Ensure no old or moldy seeds remain in the feeder.
- Keep the feeder full during peak bird activity times.
Proper maintenance helps attract more birds and keeps them healthy. Enjoy watching your feathered friends flock to your DIY pumpkin bird feeder this fall!
Enjoying The Birds
Fall is a great time to enjoy birds in your garden. A pumpkin bird feeder attracts many birds. Watching them can be a fun and relaxing activity. Let’s explore some tips for bird watching and learn how to identify common visitors.
Bird Watching Tips
Watching birds is easy with a few simple tips. Follow these steps to get started:
- Stay Quiet: Birds are scared of loud noises. Speak softly and move slowly.
- Use Binoculars: Binoculars help you see birds up close.
- Be Patient: Birds might take time to visit. Wait quietly.
- Set Up Early: Birds are active in the morning. Set up your feeder early.
Identifying Common Visitors
Many birds visit pumpkin feeders in the fall. Here are some common ones:
| Bird | Description |
|---|---|
| Chickadee | Small, black cap, white cheeks. |
| Cardinal | Bright red, black face, long tail. |
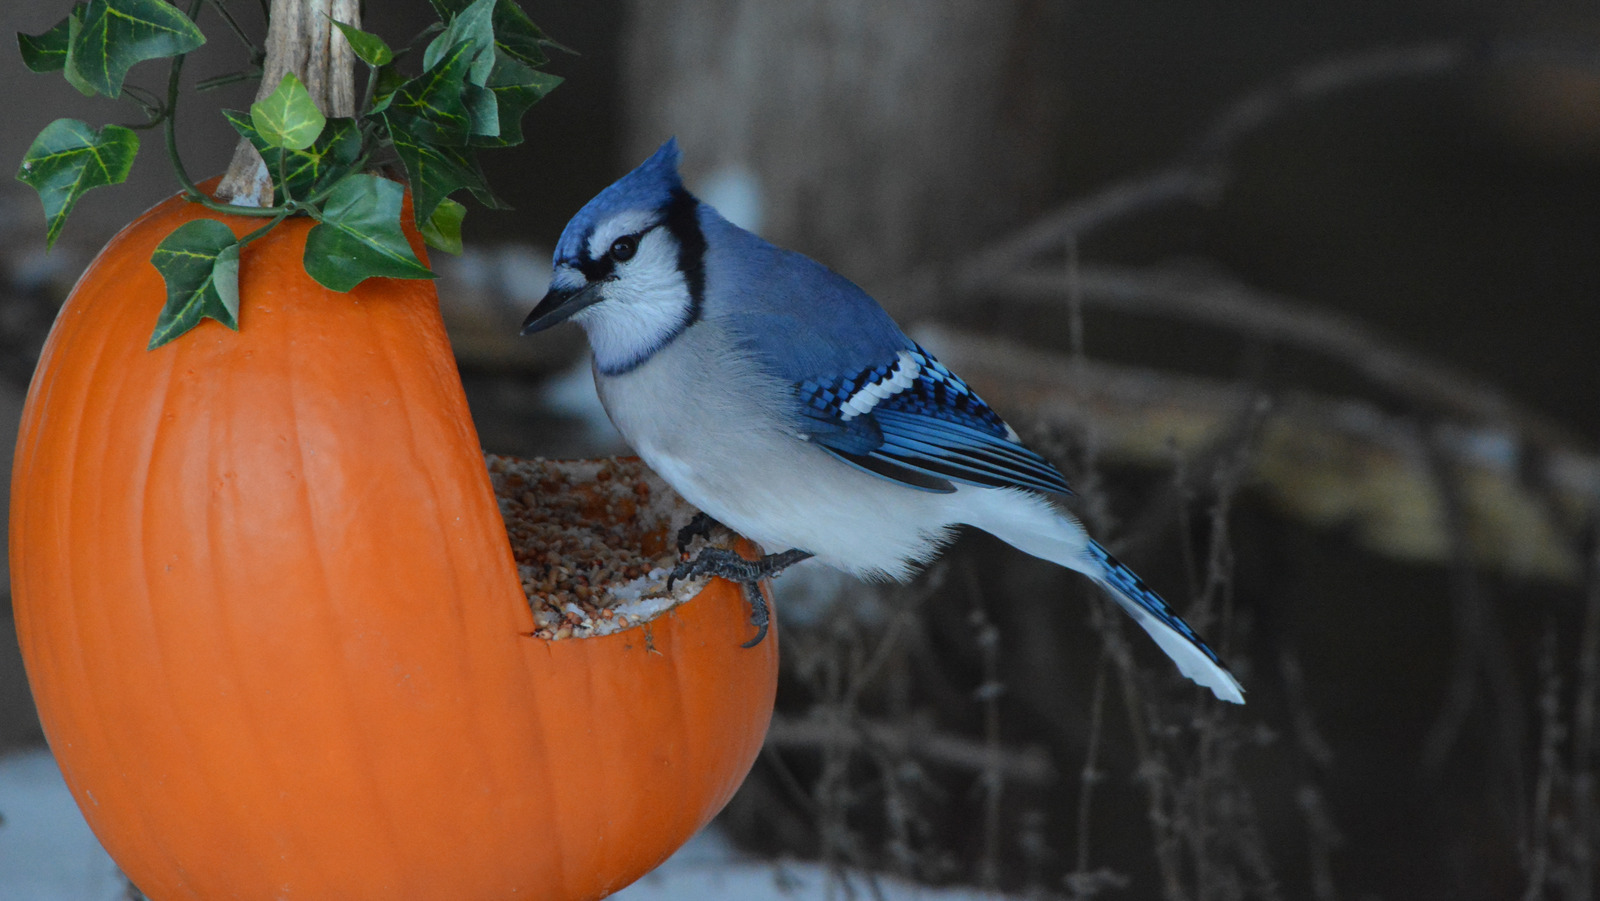
| Blue Jay | Blue feathers, white chest, loud call. |
| Sparrow | Brown, small, striped back. |
Enjoy the fall season with your pumpkin bird feeder. Happy bird watching!
Credit: www.housedigest.com
Frequently Asked Questions
How Do You Make A Pumpkin Bird Feeder?
Cut a pumpkin in half, remove seeds, attach twine, and fill with birdseed.
What Type Of Birds Like Pumpkin Feeders?
Many birds, including chickadees, nuthatches, and finches, enjoy pumpkin feeders.
How Long Does A Pumpkin Bird Feeder Last?
A pumpkin bird feeder typically lasts about one to two weeks, depending on weather conditions.
Conclusion
Creating a DIY pumpkin bird feeder is fun and rewarding. It attracts beautiful birds and enhances your garden’s charm. This eco-friendly project is easy to make and perfect for fall. Try it out and enjoy the delightful sights and sounds of nature in your backyard.
Happy crafting!

