10 Steps to Stunning DIY Wedding Decorations With Succulents
Creating stunning DIY wedding decorations with succulents doesn't have to be overwhelming. By following ten straightforward steps, you can craft elegant and personalized decor that resonates with your wedding theme. Start by choosing healthy succulent cuttings and preparing them properly. Then, move on to designing unique elements like bouquets, boutonnieres, and centerpieces that perfectly complement your special day. Don't forget to incorporate creative containers and seasonal accents for an added touch of charm. Curious about how to make your wedding unforgettable with these trendy plants? Let's explore the first step together.
Crafting a Succulent Bouquet

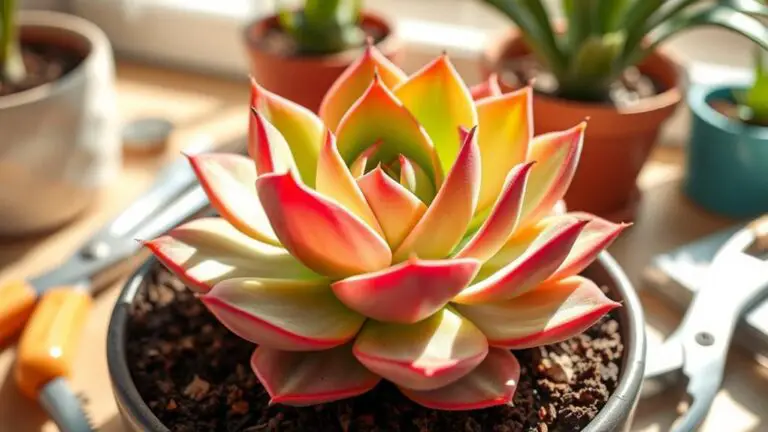
Creating a succulent bouquet is a delightful and sustainable way to add a unique touch to your wedding. Start by preparing succulent clippings. Cut healthy leaves or rosettes, making sure they're disease-free. This guarantees ideal growth and longevity for your bouquet.
Next, create faux stems. Attach floral wire to the base of each succulent and wrap it securely with floral tape. This provides support and makes the arrangement process easier.
When arranging your succulents, aim for a dome shape. Mix various sizes and colors to create visual interest. Secure the arrangement with additional floral tape to keep everything in place. This step is essential for maintaining the shape and structure of your succulent wedding bouquet.
To enhance the bouquet's aesthetics, wrap a decorative ribbon around the stems. Choose a ribbon that complements your wedding theme for a cohesive look.
Finally, remember that your succulent bouquet can be replanted after the wedding. This not only makes it a sustainable choice but also offers a keepsake that continues to grow and thrive.
Designing Boutonnieres
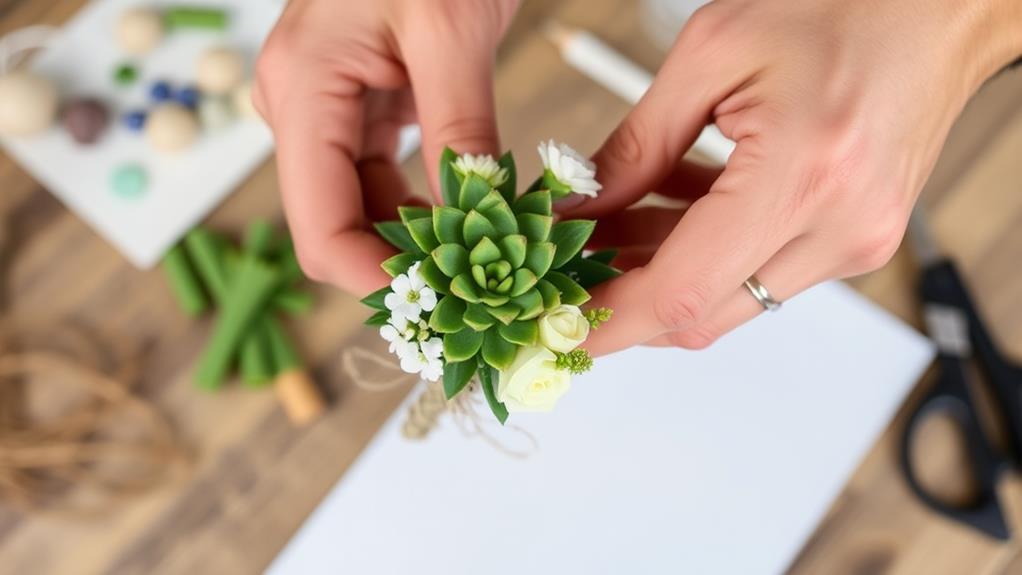
When designing boutonnieres with succulents, you'll need just a few materials like floral wire, ribbon, and two small succulent rosettes to start.
First, pierce the floral wire through the base of the succulents to keep them secure, then wrap them with floral tape for a tidy look.
Materials and Tools Required
Assembling your own succulent boutonnieres often requires a few essential materials and tools to guarantee a polished result.
Start with floral wire and floral tape, which are must-haves for securing your succulents. You'll need two succulent rosettes as the main stars of your boutonniere. To add some flair, grab some decorative ribbon.
For cutting, a strong pair of scissors or wire cutters will come in handy. These tools are perfect for trimming stems and cutting floral wire to the right length.
Want to make your boutonnieres even more eye-catching? Consider using fillers like String of Pearls. These can add visual interest and texture to your design.
A hot glue gun might be useful too. Use it to secure any extra embellishments or decorative features to the succulents or ribbon.
To keep everything organized while you work, use a small container or tray. This will help you keep all your materials and tools at your fingertips, making the assembly process more efficient.
Gathering these materials and tools will set you up for success. With everything on hand, you're ready to create beautiful, custom succulent boutonnieres for your special day.
Simple Assembly Steps
Designing your succulent boutonnieres can be a rewarding and enjoyable experience. Start by selecting two succulent rosettes. This will be the main part of your wedding centerpiece.
Pierce floral wire through the center of each rosette to secure them together. This creates a firm base for your boutonniere. Next, wrap the wire with floral tape. Make certain the tape covers the stems well. This step is important for providing a sturdy foundation.
To add texture and visual interest, incorporate filler plants like String of Pearls. These small additions make your boutonniere stand out.
After adding the filler plants, choose a ribbon that matches your wedding theme. Wrap the ribbon around the base of the boutonniere to give it a polished and elegant look.
Finally, attach a pin to the back of the boutonniere. This pin will make it easy to fasten onto the groom's lapel. Confirm that the pin is secure so that it stays in place throughout the event.
Follow these simple steps, and you'll create beautiful succulent boutonnieres that will be a stunning addition to your wedding.
Adding Decorative Elements
Adding decorative elements to your succulent boutonnieres can elevate their charm and uniqueness. You'll only need a few materials: floral wire, ribbon, and two succulent rosettes. Start by piercing the floral wire through the base of each succulent rosette. Make sure they're securely attached before wrapping them with floral tape for stability.
Incorporating fillers like String of Pearls or other small succulents can enhance the visual appeal and add texture. These fillers bring an added dimension, making your boutonnieres stand out among other wedding flowers. Once the succulents and fillers are assembled, wrap the stems with ribbon that complements your wedding's color theme. This step ties everything together, giving a cohesive and polished look.
Succulent boutonnieres are not only stylish but also low-maintenance. They're a practical choice for grooms and groomsmen, ensuring they look great throughout the special day.
Here's a quick guide to the materials and steps:
| Materials Needed | Steps to Follow |
|---|---|
| Floral wire | Pierce wire through succulent base |
| Floral tape | Secure with floral tape |
| Two succulent rosettes | Attach succulents to wire |
| String of Pearls | Add fillers for texture |
| Ribbon | Wrap stems with ribbon |
Making Succulent Hair Combs

Creating a succulent hair comb is a delightful and quick DIY project that adds a unique touch to your wedding look. Just like arranging your wedding bouquet, this little accessory can make a big impact.
Start by gathering your materials: a plastic hair comb, succulent cuttings, and floral wire. You'll be amazed at how fast and easy this project is—under 10 minutes!
First, secure your succulent cuttings to the comb with the floral wire. Confirm each piece is stable. Begin with the larger succulents as the focal points. Position them carefully to create a balanced look.
Then, fill in with smaller cuttings around the main succulents. This step guarantees your design is aesthetically pleasing.
Next, consider adding decorative elements. Small flowers or ribbons can enhance the visual appeal and tie the hair comb into your wedding theme.
These additions make your comb extra special and personalized.
Creating Guest Favors

Succulent guest favors can add a touch of thoughtfulness and sustainability to your wedding, leaving a lasting impression on your guests. These favors aren't only memorable but also eco-friendly.
To start, choose two different varieties of succulents to create visual interest. You can easily find many types of succulents online, offering a wide range of options.
Next, take your succulents out of their plastic pots and transfer them to decorative clay pots. This simple step can elevate the presentation, making the favors more attractive and special.
To personalize these keepsakes, add name tags. This small detail helps guests feel more connected to your event and gives each favor a unique touch.
Don't forget to include care instructions with each favor. This guarantees that your guests can maintain their succulents long after the wedding, allowing them to enjoy a lasting memory from your special day.
Care instructions should be simple and clear, guiding them on how much light and water their new plant needs.
Budget-Friendly Centerpieces
Creating budget-friendly centerpieces with succulents is easier than you think!
By choosing affordable succulent varieties and using discounted or repurposed containers, you can keep costs low while still achieving a stylish look.
Plus, assembling them yourself is a fun and simple process that guarantees beautiful, custom centerpieces for your big day.
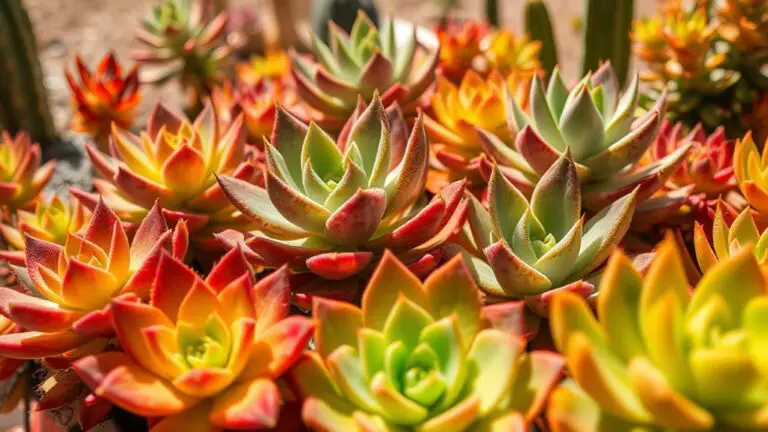
Affordable Succulent Choices
For couples looking to save money on wedding decor, opting for affordable succulent choices can be a game-changer. You can create stunning centerpieces for approximately $2.50 per table by sourcing materials locally and using natural containers.
Here are some budget-friendly ideas to get you started:
- Assorted Succulent Cuttings: Ask friends, family, or visit local markets to gather assorted succulent cuttings. These can be a cost-effective way to get a variety of plants without breaking the bank.
- Simple Soil/Perlite Mixture: Use a basic soil and perlite mixture to support your succulents. This helps them stay vibrant and healthy, guaranteeing your arrangements look fresh on the big day.
- Found Materials: Incorporate found materials like driftwood or jars for a rustic and personalized touch. Not only does this add charm, but it also keeps costs low.
To guarantee your succulents thrive, plant them about 1.5 months before the wedding. This gives them time to root properly and look robust for your event.
DIY Assembly Tips
When you've chosen your affordable succulent options, the next step is assembling your budget-friendly centerpieces. Start by gathering your essential supplies: assorted succulent cuttings, a soil/perlite mixture, and containers. You can often get cuttings from friends or local sources, which keeps costs down.
Take advantage of sales, like the 50% discount on containers at Hobby Lobby, to further save money.
For healthy rooting, plant the succulents about 1.5 months before your wedding. Place them outdoors if possible to benefit from natural sunlight. This helps the succulents grow strong and vibrant. Using succulents in your centerpieces isn't only budget-friendly but also low-maintenance.
Consider alternative designs to match your wedding theme. Succulent driftwood arrangements or compact jar displays can fit different table sizes and styles. These variations keep things interesting and adaptable.
To add a personal touch, incorporate decorative elements like ribbons or seasonal flowers. This customization aligns the centerpieces with your overall wedding theme, making them even more special.
With these diy assembly tips, you'll create stunning centerpieces that impress your guests without breaking the bank. You've got this!
Gathering Essential Supplies

To kick off your DIY succulent wedding decorations, let's gather the essential supplies you'll need. Start by collecting assorted succulent cuttings. You can get these from friends, family, or local gardening groups. It's a budget-friendly way to guarantee a diverse selection of beautiful plants.
Next, you'll need a soil/perlite mixture. This helps with proper drainage, which is vital for succulents. You can find this mixture at most garden centers or hardware stores. It's important to have the right soil to keep your succulents healthy and thriving.
Finally, choose suitable containers like terracotta pots or decorative jars. These can be found at local craft or hardware stores, often at discounted prices during sales. Look for containers that match your wedding theme to add a personal touch.
Here's a handy list to keep you on track:
- Succulent cuttings – sourced from friends, family, or local gardening communities.
- Soil/perlite mixture – for proper drainage.
- Suitable containers – like terracotta pots or decorative jars.
Remember to gather your supplies at least 1.5 months before the event. This gives your succulents time to root and flourish. Happy planting!
Planting Timelines

To make sure your succulents are ready for your wedding, plant them about 1.5 months before the big day.
This gives them enough time to root properly and grow, ensuring they look their best.
Creating a sample centerpiece early on can help you see how everything fits together and make any needed adjustments.
Optimal Planting Schedule
Although planning DIY wedding decorations with succulents can be exciting, timing is everything to guarantee they thrive on your big day. Establishing an ideal planting schedule is vital to make sure your succulents look their best. Start planting your succulents 1.5 months before the wedding. This gives them enough time to root and grow properly.
Here's how to stay on track:
- Create a Sample Centerpiece: Make a sample arrangement to visualize the final look. This allows you to make adjustments early on.
- Mix Varieties: Use a mix of succulents like Plectranthus neochilus, Graptopetalum paraguayense, and Crassula Imperialis. Different textures and colors will make your decorations stunning.
- Outdoor Placement: Place your potted succulents outdoors to let them root naturally in sunlight. This makes them more resilient and vibrant.
Starting early is important. Sourcing and arranging succulents can take several weeks, so don't wait until the last minute.
Planning your planting schedule carefully will guarantee your decorations are perfect. You'll feel more confident and prepared, knowing your succulents will be thriving and beautiful on your special day.
Rooting Timeframe Insights
Understanding the appropriate rooting timeframe is key to guaranteeing your succulents are vibrant and well-established for your wedding. You should plant your succulents about 1.5 months before the big day. This gives them enough time to root properly and look their best. Succulent varieties like Plectranthus neochilus, Graptopetalum paraguayense, and Crassula Imperialis are excellent choices due to their durability and beauty.
During this rooting period, you can create sample centerpieces. This helps you visualize the final arrangements at your venue and make any necessary adjustments. Placing these centerpieces outdoors can further enhance their growth, making them even more stunning for your wedding day.
Here's a quick guide to help you plan:
| Activity | Timeframe Before Wedding | Notes |
|---|---|---|
| Plant Succulents | 1.5 months | Guarantees proper rooting and establishment |
| Create Sample Centerpieces | During rooting period | Visualize final arrangements |
| Outdoor Placement | Throughout rooting phase | Enhances growth and readiness |
Proper planning and attention to detail are essential for your succulent arrangements. With these rooting timeframe insights, you'll be well on your way to creating beautiful, thriving decorations for your special day. Remember, patience and preparation pay off!
Sample Arrangement Benefits
Creating sample arrangements offers several benefits that can make your wedding decorations truly shine. By planting succulents 1.5 months before your wedding, you give them ample time to root and thrive, ensuring healthier and more vibrant arrangements for the big day.
Plus, a sample centerpiece helps you visualize the final look and make any necessary adjustments well in advance.
Key Benefits of Sample Arrangements:
- Visualization: Seeing a sample arrangement lets you understand how different succulent varieties like Plectranthus neochilus, Graptopetalum paraguayense, and Crassula Imperialis come together, allowing you to tweak the design to perfection.
- Healthier Plants: Planting early and placing your centerpieces outdoors during the rooting period promotes natural growth and acclimatizes the succulents to the wedding environment, resulting in robust and healthy arrangements.
- Stress Reduction: Planning and preparing ahead reduces last-minute stress. You'll feel confident knowing your decorations are ready and looking their best.
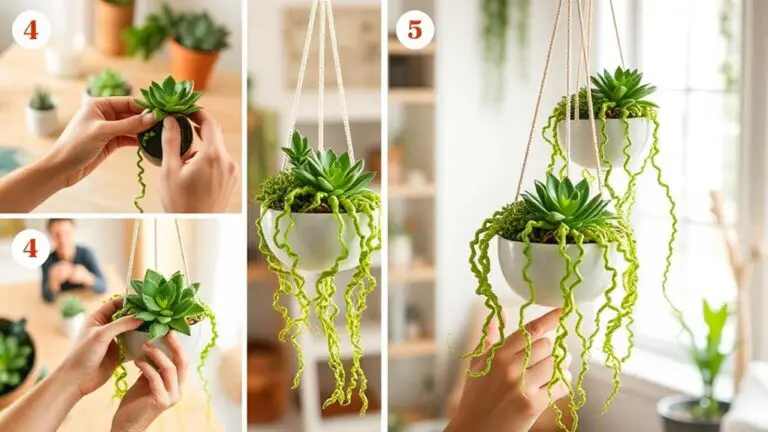
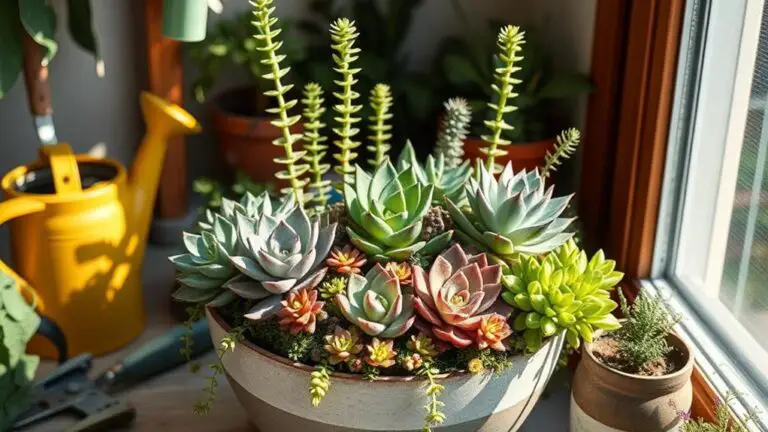
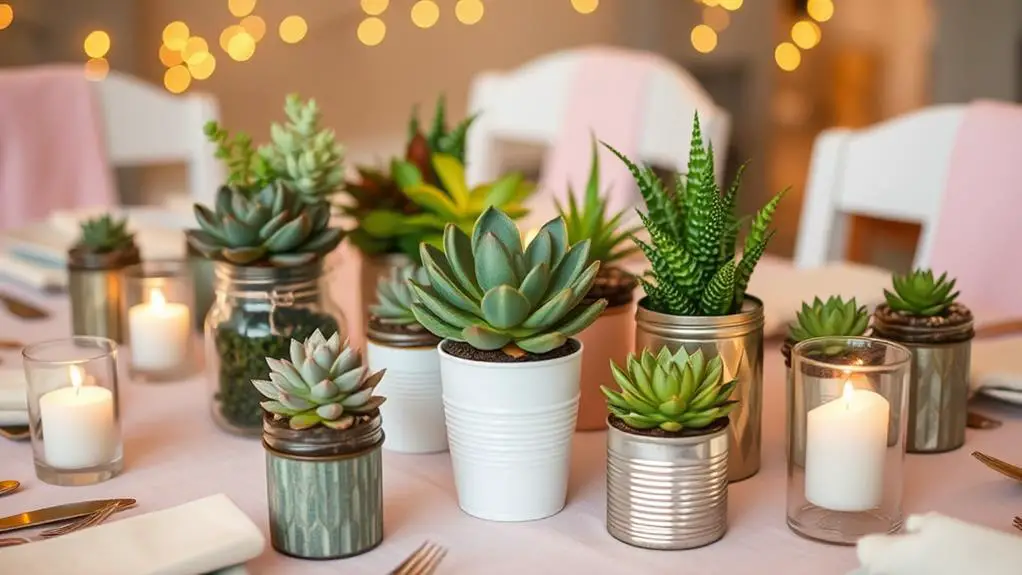
Alternative Centerpiece Ideas

Transform your wedding tables with unique and natural succulent centerpieces. These versatile and beautiful decorations can be personalized to match your wedding's style, adding a touch of greenery and charm.
One fantastic option is creating succulent driftwood centerpieces. By using found materials like driftwood, you can craft a rustic and natural aesthetic that's truly one-of-a-kind. Each piece of driftwood has its own shape and texture, making your centerpieces unique.
For smaller tables, consider succulent jar centerpieces. They're compact and visually appealing, fitting perfectly with various themes. Plus, you can easily customize them by choosing different jar styles and succulent types. Adding ribbons or real roses can enhance their visual appeal and create a cohesive look with your overall decor.
If you have tall, round bar tables, smaller, sturdy centerpieces are ideal. Succulents add charm without obstructing conversation, making them perfect for mingling areas.
Customization is key. Varying the types of succulents and container styles allows you to reflect your personal style in your centerpiece arrangements.
These alternative ideas guarantee your wedding decor is both stunning and meaningful, creating a memorable atmosphere for your special day.
Unique Decor Elements

Embrace the uniqueness of your wedding with five distinct decor elements that feature succulents in creative ways. These elements won't only enhance your wedding's aesthetic but also leave a lasting impression on your guests.
First, consider a succulent wall as an alternative to traditional flower walls. It's a fresh and modern backdrop for photos and maintains its shape and freshness longer than flowers.
Second, incorporate succulents into your wedding arch. This creates a cohesive design that enhances the ceremony space beautifully.
Third, hanging glass jars filled with succulents from branches adds a whimsical touch and utilizes vertical space effectively.
Here are three more unique ideas to inspire you:
- Chair Decor: Tie small succulents to the backs of chairs or incorporate them into chair decor. This adds a personalized touch to each seating area.
- Centerpieces: Pair succulent centerpieces with candles to create a romantic atmosphere. This highlights the natural beauty of the plants, making them perfect for evening receptions.
- Hanging Decorations: Use hanging glass jars filled with succulents to add dynamic visual interest.
DIY Themed Arrangements

For a personal touch that aligns with your wedding theme, DIY succulent arrangements offer endless possibilities. You can match the colors and styles specific to your chosen theme, whether it's beachy or vintage.
Imagine beautiful blue-green succulents paired with seashells for a coastal feel or soft pink ones nestled in antique teacups for a charming, vintage vibe.
Seasonal themes can shine with the right succulent varieties. Choose colors and textures that reflect the time of year. For a spring wedding, mix pastel succulents with fresh flowers. For fall, incorporate rich, warm tones.
These touches make your decor cohesive and delightful.
Creative containers add charm and reflect your personality. Think beyond basic pots. Use mason jars, teacups, or even tiny wooden boxes to plant your succulents.
These unique choices make your arrangements memorable.
Mixing succulents with seasonal flowers and fruits can create stunning displays. Imagine succulents with berries or tiny pumpkins for a fall theme.
This blend of elements aligns perfectly with your wedding's aesthetic.
DIY themed arrangements are cost-effective, letting you take a hands-on approach.
You'll find joy in creating these special decorations, making your wedding even more personal and beautiful.
Frequently Asked Questions
How Do You Make Beautiful Succulent Arrangements?
Start by picking various colorful succulents. Use well-draining soil and containers matching your theme. Place larger succulents first, then smaller ones. Add pebbles, moss, or ribbons for a polished look, tying everything into your wedding's decor.
How Do You Use Succulents in a Wedding Bouquet?
You can use succulents in your wedding bouquet by mixing them with traditional flowers for contrast or creating a bouquet entirely from succulents. Choose colors that match your palette and add decorative elements for a polished look.
How Do You Make a Succulent Display?
To make a succulent display, choose healthy varieties, select a suitable container, fill it with a soil/perlite mix, arrange the succulents aesthetically, and water lightly. Make certain they get enough sunlight and allow time to root.
How to Decorate With Plants for a Wedding?
You can decorate with plants for a wedding by mixing lush greenery with flowers, arranging them in elegant vases or rustic pots, creating living backdrops, and offering potted plants as eco-friendly favors for your guests.
Conclusion
You've got this! With these ten steps, you can create beautiful DIY wedding decorations using succulents. By choosing healthy cuttings, designing unique elements, and assembling your arrangements ahead of time, your decor will be unforgettable. Don't forget to personalize guest favors and add special touches like ribbons and seasonal accents. Trust yourself, follow the steps, and your wedding will be filled with gorgeous, green details that everyone will love. Happy crafting!