How To Grow Black Orchid Flower From Seed
When I first considered growing black orchids from seed, I quickly realized it’s a meticulous process requiring patience and precision. It all begins with sourcing high-quality seeds from reputable sellers, which can be a challenge in itself. Once you have the seeds, preparing a sterile agar medium with the correct pH balance is vital. But that’s just the start. Ensuring the right temperature and humidity levels is essential for successful germination. Curious about how to create the perfect environment and care for these delicate seedlings? Let’s explore the detailed steps and best practices together.
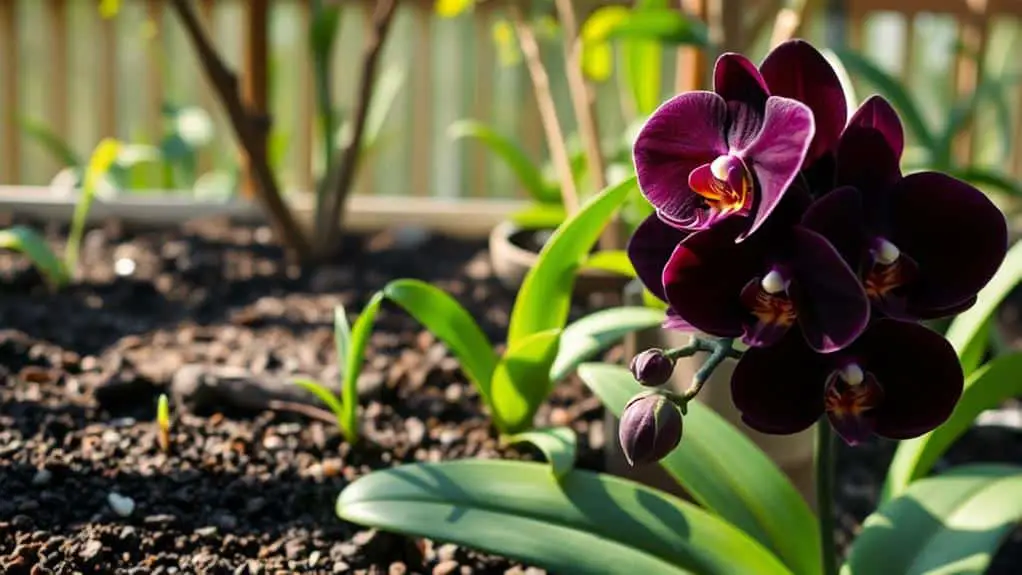
Benefits of Growing Black Orchids

Growing black orchids offers many benefits that can greatly enhance your gardening experience. Their striking deep purplish-black flowers catch everyone’s eye and bring a unique touch to any garden or indoor space.
Starting with orchid seeds and nurturing young orchids can be a rewarding challenge. It’s a process that deepens your understanding of orchid care and propagation.
Plus, having black orchids in your collection adds value and rarity, making them a prized possession. As you patiently watch your orchids grow, you’ll feel a sense of accomplishment.
By growing these rare flowers, you’re also helping to preserve them and promote biodiversity.
Sourcing Quality Black Orchid Seeds
When it comes to sourcing quality black orchid seeds, your best bet is to prioritize reputable sellers with strong positive reviews.
Freshly harvested seeds are essential because older seeds often have lower germination rates. It’s wise to avoid purchasing from inexperienced sellers or platforms like eBay, which mightn’t guarantee quality.
Instead, focus on specialized orchid nurseries or botanical gardens, as they’ve the expertise in rare orchid species. Always check for certification or documentation of seed origin. This helps with proper handling and increases the chances of successful germination.
Sterilizing Seeds and Equipment

Sterilizing seeds and equipment is an essential step to guarantee the healthy development of your black orchid seedlings.
Begin by soaking the seeds in a 3% hydrogen peroxide solution to prevent contamination and improve germination. It’s vital to also sterilize all tools and surfaces you’ll be using. I recommend using bleach or ethanol for this purpose.
For the water, boiling it beforehand guarantees it’s free from any contaminants. Always maintain sterile conditions throughout the sowing process, as fungi and bacteria can severely hinder seedling growth.
Using sterilized equipment, like a heated pressure vessel or autoclave, for your agar media and containers is also beneficial. This process should maintain a pressure of at least 15 psi.
Preparing the Agar Medium
After sterilizing the seeds and equipment, it’s time to prepare the agar medium, which serves as the nutrient-rich foundation for black orchid germination.
First, mix calcium nitrate, magnesium sulfate, and agar, aiming for a pH between 4.8 and 5.2. This pH balance is essential for effective orchid seed germination.
Next, sterilize your tools and surfaces with bleach while wearing gloves to prevent contamination.
Then, carefully heat the agar solution until it dissolves completely. After heating, pour it into sterile containers and let it cool and solidify.
Remember, the agar medium should be rich in nutrients since black orchid seeds lack food reserves.
Once solidified, you can place the seeds on the medium for germination.
Creating a Sterile Environment

Creating a sterile environment is key to growing black orchid seeds successfully.
I recommend using essential sterilization tools like a laminar flow cabinet or a DIY glovebox to prepare a clean workspace.
Don’t forget to sterilize the seeds and all containers using agents like hydrogen peroxide or bleach to keep everything contaminant-free.
Essential Sterilization Tools
When it comes to successfully growing black orchid flowers, guaranteeing a sterile environment is absolutely critical.
To start, a heated pressure vessel is essential for sterilizing tools and media, reaching 15 psi to effectively sterilize. Use chemical sterilants like bleach and hydrogen peroxide cautiously to disinfect surfaces, seeds, and tools before you sow orchid seeds.
Laminar flow cabinets are great for maintaining sterility but can be pricey; a DIY glovebox is a good alternative. Ascertain all containers, whether plastic or glass, are sterilized to prevent contamination.
Preparing Sterile Workspace
Achieving sterility in your workspace is paramount to the successful cultivation of black orchid flowers.
To create a sterile workspace, you can use a laminar flow cabinet or a DIY glovebox as a cost-effective alternative. Sterilization of tools, containers, and media is essential.
Here’s how to maintain a clean workspace:
- Regularly sanitize surfaces: Wipe down all surfaces with disinfectants.
- Use personal protective equipment: Wear gloves and goggles to minimize contamination risks.
- Utilize RO or distilled water: Tap and rainwater might contain harmful contaminants.
Seed and Medium Sterilization
Guaranteeing a sterile environment is essential when preparing to germinate black orchid seeds. Start by soaking the seeds in a 3% hydrogen peroxide solution for 10-15 minutes to disinfect them. This helps eliminate any contaminants.
Next, sterilize all your tools and containers using a heated pressure vessel or autoclave. Make sure they maintain a pressure of at least 15 psi for effective sterilization.
Prepare the agar medium with essential nutrients and ascertain the pH is between 4.8 and 5.2, which is ideal for seed germination. Boil the water used in the process to kill any pathogens.
Create a clean workspace by using a laminar flow cabinet or a DIY glovebox. This prevents contamination during the sowing and handling of seeds.
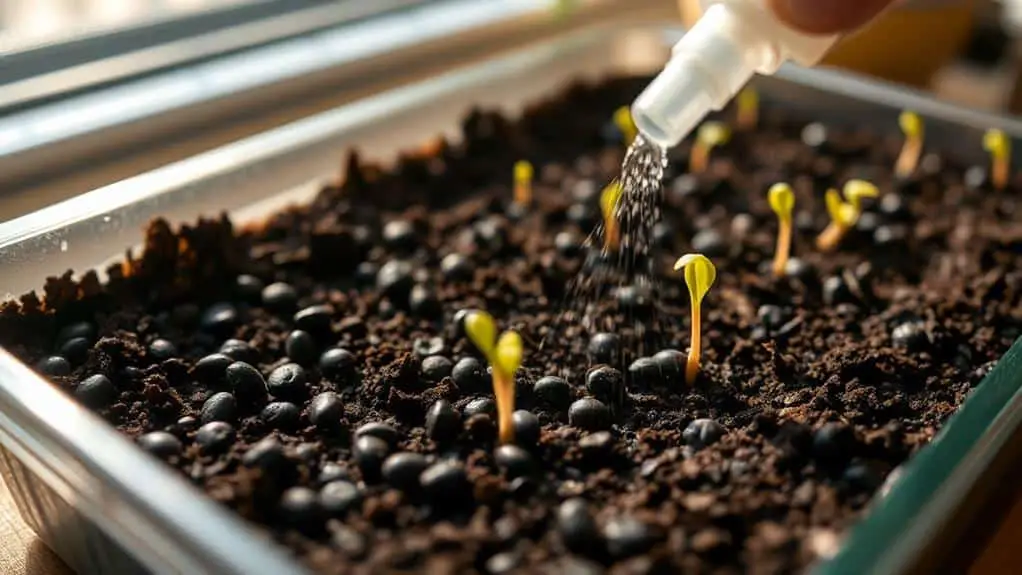
Sowing Black Orchid Seeds
To successfully sow black orchid seeds, start by obtaining high-quality seeds from reputable sellers, as germination greatly depends on their viability.
Once you’ve got your seeds, prepare a sterile potting mix using coarse bark and sphagnum moss. This creates the perfect environment for these tiny, dust-like seeds.
Next, sow the seeds on the surface of the sterile medium. Don’t bury them—black orchid seeds need light to germinate.
To maintain the right conditions, follow these steps:
- Cover the container with a clear plastic lid to keep humidity high.
- Place the container in indirect light.
- Ascertain temperatures stay between 56 to 80 degrees Fahrenheit.
Monitoring Seed Germination
Once you’ve sown the black orchid seeds, it’s time to keep a close eye on the germination process. Monitoring orchids regularly is essential since seed germination can take days or even months.
Look for signs like embryo swelling and the development of chlorophyll, which show progress toward the protocorm stage. Keep the incubation temperature between 70°F and 80°F for the best results.
Additionally, make sure the agar medium’s pH stays between 4.8 and 5.2, as this range supports healthy seedling development.
After roots start to appear, begin to monitor for the need for fertilization, but only at this stage. Staying patient and attentive will help you succeed in growing beautiful black orchids.
Transplanting Seedlings
Transplanting seedlings is an important step in growing black orchids successfully. Once the seedlings develop a few roots and leaves, they’re ready for this shift.
First, wash them in lukewarm water to remove any residual agar, which helps reduce the risk of fungal infections.
Next, prepare a well-draining potting mix using coarse bark and other materials. This mix is vital to prevent root rot and support healthy growth.
Space the seedlings about two inches apart in the pot to allow for proper air circulation and growth.
- Use well-draining potting mix
- Wash seedlings in lukewarm water before deflasking
- Space seedlings two inches apart
Gradually acclimatize the seedlings to outdoor conditions by starting them in deep shade, then slowly increasing light exposure.
Ideal Growing Conditions
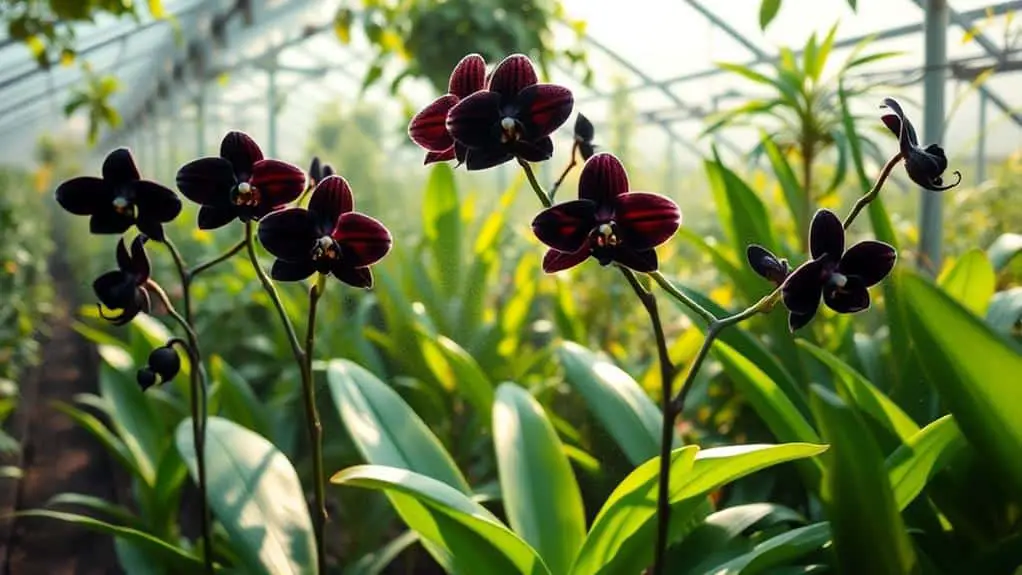
Creating the ideal growing conditions for black orchids is vital to their success. First, keep the temperature between 56 to 80 degrees Fahrenheit (13 to 27 degrees Celsius) to mimic their tropical origins. Humidity is also essential; aim for 60% to 80% to keep the seedlings moist.
Use this table for guidance:
| Condition | Requirement |
|---|---|
| Temperature | 56-80°F (13-27°C) |
| Humidity | 60%-80% |
| Sunlight | Indirect light |
| Acclimatization | Gradual, starting in shade |
| Monitoring | Regular checks on humidity |
Indirect sunlight is best since direct sunlight can harm the leaves. Gradually acclimate your seedlings to outdoor conditions, starting them in deep shade. Regularly monitor humidity and light levels to guarantee successful growth. By focusing on these ideal growing conditions, you’ll set your black orchids up for thriving growth.
Troubleshooting Common Issues
Now, let’s tackle some common issues that might come up when growing your black orchid.
High humidity is essential for young plants, so keep levels between 60% and 80% to avoid poor growth or death.
Also, watch out for overwatering, which can lead to root rot; make sure your potting medium drains well and water only when it starts to dry out.
Identifying Growth Problems
When growing black orchids, keeping a keen eye on potential growth problems is crucial for maintaining a healthy plant. If you notice signs of distress, such as wrinkly, droopy, or discolored leaves, your orchid might be suffering.
Here are a few things to watch for:
- Humidity: Too low can cause dehydration, while too high fosters fungal diseases.
- Ventilation: Poor airflow can lead to root suffocation and algae buildup, hindering growth.
- Watering and Nutrients: Discolored leaves or rotting roots may indicate improper watering or nutrient deficiencies.
Repotting in fresh medium can help if you see poor health or stunted growth.
Always monitor your plant carefully and adjust care as needed. This vigilance guarantees your black orchid thrives.
Preventing Pest Infestations
Keeping your black orchids free from pests is essential for ensuring their health and vigor. Regularly inspect your orchids for signs of pests like aphids, mealybugs, and scale. These pests can weaken your plants and stunt their growth.
Maintain high humidity levels between 60% and 80% to make the environment less appealing to pests. However, good air circulation is vital to prevent stagnation. Apply neem oil or insecticidal soap as a preventive measure, following the instructions carefully.
Clean your growing area regularly and remove any dead or decaying plant material to avoid attracting pests. Quarantine any new plants before adding them to your collection to monitor for infestations.
Frequently Asked Questions
How Long Does It Take to Grow an Orchid From Seed?
Growing an orchid from seed takes years. Seed germination alone can take weeks to months. With proper orchid care, expect 2 to 5 years for the first blooms. Patience and attention to conditions are essential for success.
Why Are Orchid Seeds so Difficult to Grow?
Orchid seed germination is tough due to their tiny size and lack of nutrients. They need specific growth requirements like mycorrhizal fungi and sterile conditions. Fluctuating environments and high contamination risks make successful growth even harder.
What Is the Easiest Orchid to Grow From Seed?
When it comes to beginner orchids, I’d recommend starting with Phalaenopsis or Cattleya. Their seed germination rates are higher, and they’re quite forgiving. Just make sure you have a nutrient-rich agar medium and maintain high humidity.
What Does an Orchid Seed Look Like?
An orchid seed looks like tiny, pale yellow or tan dust particles. These seeds have a unique structure and lack food reserves, requiring a symbiotic relationship with fungi during the germination process to obtain essential nutrients.
Conclusion
Growing black orchids from seed might seem challenging, but you can do it! Start with quality seeds, prepare your agar medium, and maintain a sterile environment. Keep an eye on temperature and humidity for successful germination. Once your seedlings develop, transplant them carefully and gradually acclimate them to outdoor conditions. With patience and care, you’ll enjoy the beauty of black orchids. Remember, every step you take brings you closer to success. Happy gardening!