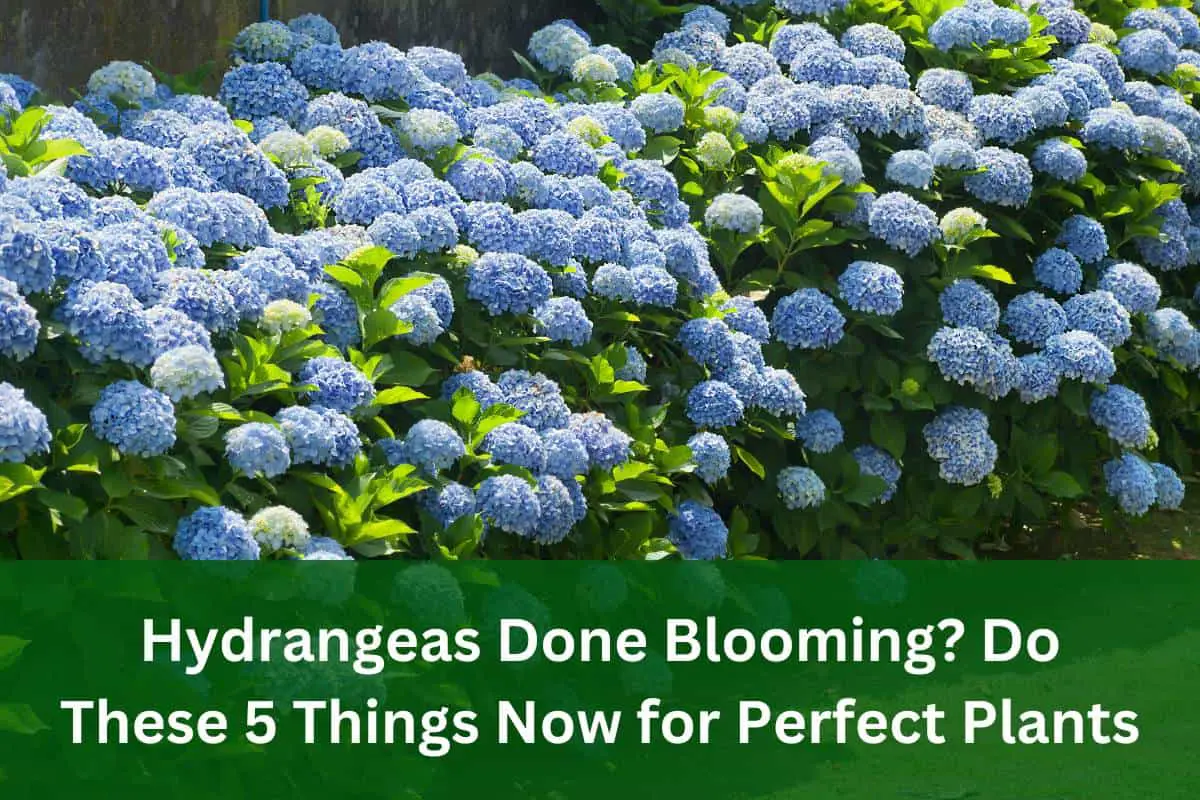
Hydrangeas Done Blooming? Do These 8 Things Now for Perfect Plants
Prune spent blooms to encourage new growth. Add mulch to retain moisture and protect roots.
Hydrangeas require attention after blooming to stay healthy. Begin by pruning spent blooms to encourage new growth. Mulching helps retain soil moisture and protects the roots from temperature changes. Fertilize with a balanced, slow-release fertilizer to support the plant’s overall health.
Check for pests and diseases, treating any issues promptly. Water the hydrangeas regularly, ensuring the soil stays consistently moist. These steps will keep your hydrangeas vibrant and prepare them for the next blooming season. Taking care of your hydrangeas now ensures a beautiful garden display later.
1. Assessing Plant Health
Hydrangeas are a garden favorite, known for their vibrant blooms. Once they finish blooming, it’s crucial to assess their health. This ensures they’ll return strong next season. Here are key steps to help you in assessing plant health.
Check For Disease
Inspect your hydrangeas for any signs of disease. Look for unusual spots, discoloration, or wilting leaves. Use a magnifying glass to check for tiny pests or fungi.
- Leaf Spots: Brown or black spots can indicate fungal issues.
- Discoloration: Yellowing leaves might mean nutrient deficiencies.
- Wilting: Drooping leaves could signal root problems or pests.
If you find any of these signs, treat them promptly. Use appropriate fungicides or insecticides as needed.
Evaluate Soil Quality
Healthy soil is key for vibrant hydrangeas. Test your soil to determine its pH and nutrient levels. Hydrangeas thrive in slightly acidic soil, with a pH of 5.5 to 6.5.
| Nutrient | Ideal Level |
|---|---|
| Nitrogen (N) | Medium to High |
| Phosphorus (P) | Medium to High |
| Potassium (K) | Medium to High |
Adjust soil nutrients based on test results. Add compost or organic matter to improve soil structure. Ensure the soil drains well to prevent root rot.
:max_bytes(150000):strip_icc()/ms-hydrangea-fe3b3510db6641fca11f38f5840e41b1.jpg)
Credit: www.marthastewart.com
2. Pruning Techniques
Pruning hydrangeas is important for their health. It helps them grow better. After blooming, it’s time to prune them. Let’s look at the best techniques.
Remove Spent Blooms
Spent blooms are old flowers. They look dry and brown. Remove them to help the plant. Use clean, sharp scissors or pruning shears.
- Find the spent blooms.
- Cut just above the first set of leaves.
- Dispose of the removed blooms in compost.
Trim Dead Branches
Dead branches can hurt the plant. They take away energy. Trim them to help the hydrangea grow strong.
- Identify the dead branches. They are dry and brittle.
- Cut them close to the base.
- Make sure to use clean tools.
- Check for pests or diseases on the trimmed branches.
| Task | Tool Needed |
|---|---|
| Remove Spent Blooms | Pruning Shears |
| Trim Dead Branches | Pruning Shears |
Pruning is easy with the right tools. Keep your hydrangeas healthy and beautiful!
3. Soil Enrichment
After hydrangeas finish blooming, it’s vital to enrich the soil. This helps your plants thrive and bloom beautifully next season. Healthy soil provides essential nutrients and improves plant health.
Add Compost
Adding compost boosts soil health. Compost is rich in organic matter, which enhances soil structure and fertility. Spread a 2-3 inch layer of compost around the base of your hydrangeas. Work it into the top 6 inches of soil. This improves drainage and promotes root growth.
- Boosts soil health
- Enhances soil structure
- Improves drainage
- Promotes root growth
Apply Mulch
Mulching helps retain moisture and suppresses weeds. Use organic mulch like wood chips or straw. Apply a 2-3 inch layer around the base of your plants. Ensure the mulch does not touch the stems directly. This prevents rot and keeps pests away.
- Retains moisture
- Suppresses weeds
- Prevents rot
- Keeps pests away
4. Watering Schedule
Hydrangeas are beautiful plants that brighten any garden. After blooming, it’s crucial to adjust your watering schedule to ensure their continued health. Proper watering helps hydrangeas store energy for the next blooming season.
Adjust For Season
The watering needs of hydrangeas change with seasons. In spring and summer, hydrangeas need more water. During fall and winter, reduce watering. This helps avoid root rot and other diseases.
| Season | Watering Frequency |
|---|---|
| Spring | 2-3 times per week |
| Summer | 3-4 times per week |
| Fall | 1-2 times per week |
| Winter | 1 time per week |
Check Moisture Levels
Always check soil moisture before watering. Insert your finger into the soil about 2 inches deep. If the soil feels dry, it’s time to water. If it feels moist, wait a day or two.
- Dry soil: Water the plant.
- Moist soil: Wait before watering.
Using a moisture meter can also help. This tool gives an accurate reading of soil moisture, ensuring you don’t overwater or underwater.
5. Fertilizing Tips
After your hydrangeas finish blooming, they need proper care. Fertilizing is key to their health. Use the right methods to make them thrive.
Choose The Right Fertilizer
Picking the correct fertilizer is crucial. Hydrangeas prefer balanced fertilizers. Look for a 10-10-10 or 20-20-20 ratio.
| Fertilizer Type | N-P-K Ratio |
|---|---|
| General Purpose | 10-10-10 |
| High Potassium | 20-20-20 |
Organic options are also good. Compost or well-rotted manure works well. Always read the label for proper usage.
Timing Of Application
Timing your fertilizer application is important. Apply once in early spring. This boosts growth and prepares the plant for blooming.
Another application can be done in early summer. This supports the plant during the blooming phase.
- Early Spring: Boosts growth
- Early Summer: Supports blooming
Avoid fertilizing after August. Late fertilizing can lead to frost damage.
6. Pest Control
When hydrangeas stop blooming, it’s crucial to address pest issues. Pests can harm your plants, preventing future blooms. Timely pest control ensures your hydrangeas remain healthy and vibrant for the next season.
Identify Common Pests
First, identify the common pests affecting hydrangeas. Knowing the enemy helps you combat them effectively.
- Aphids: These tiny insects suck plant sap, causing leaves to curl and yellow.
- Spider Mites: Small and difficult to see, these pests cause stippling on leaves.
- Scale Insects: These pests attach to stems and leaves, appearing as small, brown bumps.
- Slugs and Snails: They feed on leaves, creating holes and ragged edges.
Natural Remedies
Utilize natural remedies to control pests without harming your plants or the environment.
| Pest | Natural Remedy |
|---|---|
| Aphids | Spray a mixture of water and dish soap. |
| Spider Mites | Use neem oil spray to deter them. |
| Scale Insects | Apply rubbing alcohol with a cotton swab. |
| Slugs and Snails | Place crushed eggshells around the base of the plant. |
7. Winter Preparation
As winter approaches, it’s crucial to prepare your hydrangeas to ensure they thrive. Proper winter preparation helps safeguard your plants from the harsh cold. Let’s dive into two essential steps for winter preparation.
Protect From Frost
Frost can cause significant damage to your hydrangeas. You can use burlap or frost cloth to cover your plants. This creates a barrier against freezing temperatures. Secure the covering with stakes or ties to keep it in place.
Another effective method is to use mulch around the base of the plant. Mulch acts as an insulator, preventing the soil from freezing. A 2-3 inch layer of mulch should be sufficient.
| Material | Purpose |
|---|---|
| Burlap | Protects from frost |
| Frost Cloth | Insulates plants |
| Mulch | Prevents soil freezing |
Insulate Roots
Protecting the roots is vital for the health of your hydrangeas. Insulate the roots by adding a thick layer of organic material. Straw, leaves, or pine needles work well for this purpose. The insulation helps maintain a stable temperature around the roots.
Another tip is to water your hydrangeas before the first frost. Moist soil retains heat better than dry soil, offering extra protection. Make sure not to overwater, as this can cause root rot.
- Use straw, leaves, or pine needles for insulation.
- Water the soil before the first frost.
- Avoid overwatering to prevent root rot.
Follow these steps to ensure your hydrangeas survive the winter.
8. Propagation Methods for Hydrangeas
Hydrangeas are beautiful flowering plants that can be easily propagated. After blooming, consider growing more hydrangeas using different propagation methods. This section will cover two popular methods: cuttings and layering.
Cuttings
Taking cuttings from hydrangeas is a simple way to grow new plants. Follow these steps:
- Select a healthy stem: Choose a stem without flowers.
- Cut the stem: Make a cut below a leaf node.
- Remove lower leaves: Leave only the top leaves.
- Dip in rooting hormone: This helps the stem grow roots.
- Plant the cutting: Place it in a pot with moist soil.
- Cover with plastic: This keeps the cutting humid.
- Wait for roots: Check for roots in a few weeks.
Growing new hydrangeas from cuttings is fun and easy. Ensure the soil stays moist for best results.
Layering
Layering is another effective method for propagating hydrangeas. Follow these steps:
- Select a low branch: Choose a branch near the ground.
- Make a small cut: Gently cut the branch where it touches the ground.
- Bend the branch: Bend it down to the soil.
- Secure it: Use a pin or rock to hold the branch in place.
- Cover with soil: Cover the cut part with soil.
- Water regularly: Keep the soil moist.
- Wait for roots: Check for roots in a few months.
- Transplant: Once rooted, cut the new plant from the mother plant and replant it.
Layering takes longer than cuttings but is very effective. It’s an excellent way to grow strong new hydrangea plants.
Hydrangea Varieties
Hydrangeas are beloved for their stunning blooms and diverse types. Different varieties bring unique beauty to gardens. Understanding these varieties helps you care for them properly.
Popular Types
- Bigleaf Hydrangea (Hydrangea macrophylla): Known for its large, colorful blooms.
- Panicle Hydrangea (Hydrangea paniculata): Features cone-shaped flower clusters.
- Smooth Hydrangea (Hydrangea arborescens): Recognized for its rounded flower heads.
- Oakleaf Hydrangea (Hydrangea quercifolia): Notable for its oak-shaped leaves and white flowers.
- Climbing Hydrangea (Hydrangea anomala petiolaris): A vine variety with lacy, white blooms.
Characteristics
| Variety | Bloom Time | Flower Color |
|---|---|---|
| Bigleaf Hydrangea | Summer | Blue, Pink, Purple |
| Panicle Hydrangea | Late Summer to Fall | White, Pink |
| Smooth Hydrangea | Early Summer | White |
| Oakleaf Hydrangea | Summer | White, Fades to Pink |
| Climbing Hydrangea | Late Spring to Summer | White |
Bigleaf Hydrangeas prefer shade and moist soil. Panicle Hydrangeas thrive in full sun and can tolerate drought. Smooth Hydrangeas are easy to grow and adaptable. Oakleaf Hydrangeas need well-drained soil and partial shade. Climbing Hydrangeas love rich soil and can climb walls or trees.

Credit: www.ruralsprout.com
Common Mistakes for Growing Hydrangeas
Hydrangeas are beautiful plants, but they need care. Many people make mistakes that harm their hydrangeas. Let’s explore some common errors.
Overwatering
Overwatering is a frequent mistake. Hydrangeas like water, but too much can hurt them.
| Signs of Overwatering | Effects |
|---|---|
| Yellow leaves | Root rot |
| Drooping stems | Fungus growth |
Water your hydrangeas when the topsoil feels dry. Do not let them sit in water.
Improper Pruning
Improper pruning can also damage hydrangeas. They need pruning, but the timing is key.
- Prune at the right time: After they bloom.
- Use clean tools: Dirty tools can spread diseases.
- Cut correctly: Make clean cuts above the leaf nodes.
Pruning encourages new growth and keeps the plant healthy. Avoid cutting too much at once.
Frequently Asked Questions
What To Do When Hydrangeas Are Done Blooming?
Prune dead blooms to promote new growth. Water deeply and mulch to retain moisture. Fertilize lightly. Remove dead or diseased branches. Prepare for winter protection.
What Month Do You Cut Hydrangeas Back?
Prune hydrangeas in late winter or early spring. This timing helps promote healthy growth and abundant blooms.
Should I Remove Dead Blooms From Hydrangeas?
Yes, removing dead blooms from hydrangeas promotes new growth and maintains plant health. Use clean, sharp scissors for best results.
Conclusion
Taking care of hydrangeas after they bloom ensures their health and beauty. Prune dead blooms, water them well, and fertilize appropriately. Protect your plants from pests and prepare them for the next blooming season. Following these steps will keep your hydrangeas vibrant and thriving.
Enjoy your stunning garden year-round!

